
Rust on a truck bed isn’t just an eyesore—it’s a silent troublemaker that can eat away at your vehicle’s strength.
The sooner you spot it and deal with it, the easier (and cheaper) your life will be.
In this guide, I’ll walk you through the basics of rust repair, share the must-have tools, and throw in a few handy tips so you can keep your truck looking sharp and working hard.
Because let’s be honest—your truck deserves better than being slowly chewed up by rust.
Knowing the Truck Bed Rust
If you own a truck, rust is pretty much the uninvited guest that shows up sooner or later. Water, air, and time are all it takes for corrosion to sneak in.
The result? A truck bed that looks tired and worn, and worse, one that’s losing its muscle.
The good news is that if you deal with a rusted truck bed floor early, you’ll add years to your truck’s life.
Causes of Rust
Rust is metal’s version of a bad relationship with moisture.
Rain and snow don’t help, and road salt? That’s like throwing gasoline on the fire. Add a few scratches that expose bare metal, and rust gets a VIP invitation. Skipping maintenance only makes things worse.
Signs of Rust Damage
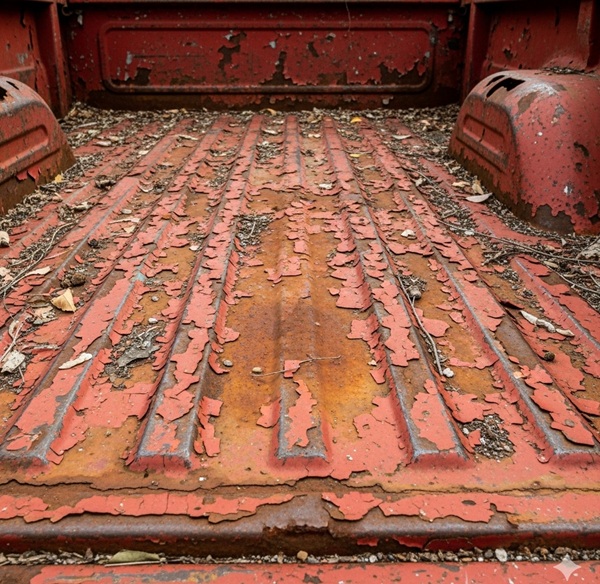
Think of rust as your truck’s way of waving a red (or brown) flag. Tiny spots are the early warnings.
Bubbling paint on the truck beds and panels means rust is already hiding underneath.
Holes and flaky metal are the late-stage drama you definitely don’t want.
The fix? Inspect your truck bed regularly—catching rust early makes it a minor inconvenience instead of a major repair.
How to Get the Rust off from Truck Bed?
If you are looking for a friendly, punchy step-by-step how-to guide that walks you through fixing truck-bed rust like you actually mean it, here’s all the knowledge you need.
But before you proceed, remember to:
- Work in a well-ventilated area.
- Wear a proper respirator (not just a dust mask) when grinding, sanding or spraying.
- Eye protection and gloves are non-negotiable.
- Read product labels of all the tools & materials you use.
1) Inspect & decide the scope
Walk the bed floor slowly. Mark spots: surface scale, bubbling paint (underlying rust), pits, or holes. If metal is thin or there are large structural holes, consider a pro — welding or panel replacement may be required.
2) Clean the area
Remove loose dirt and debris. Wash with soap and water, then dry. Use a degreaser to remove wax, oil, and residues so your repairs will actually stick.
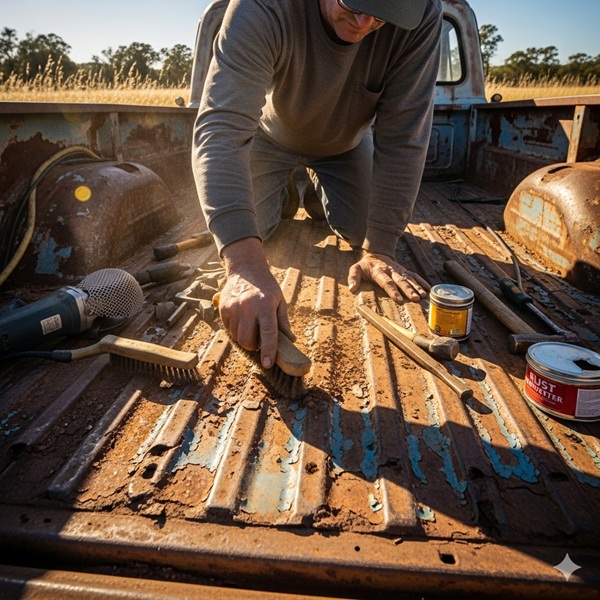
3) Remove loose rust and flaking paint
Use a wire brush or wire wheel to knock off flaky rust and loose paint. For small areas, sand down to bare metal with 80–120 grit until you reach sound metal. Be gentle around thin metal — don’t overgrind.
4) Treat remaining rust
Brush on a rust converter to chemically stabilize any rust you can’t remove mechanically. Follow the product directions exactly — it turns reactive rust into a paintable surface.
5) Sand and feather the edges
Sand the treated area and surrounding paint to feather the transition (120–220 grit). This helps primer and paint blend and prevents future peeling.
6) Repair pits and holes
- Small pits: use a two-part epoxy metal filler. Mix, apply in thin layers, shape with a spreader, let cure (per product instructions), then sand smooth.
- Larger holes: patch with welded metal if possible. If you can’t weld, use a solid metal patch plus structural epoxy and seal the seams — but plan for a pro repair later if strength is an issue.
7) Clean again
Wipe dust and sanding residue with a tack cloth and degreaser. Paint won’t bond to dust or grease.
Also, make sure that you clean properly to dissolve rust and loosen rusty bolts.
8) Mask off the bed
Use tape and plastic to protect the rest of the truck. Remove hardware or cover tie-downs if possible.
9) Prime the repaired area
Apply a rust-inhibiting primer (etch or epoxy). Spray thin, even coats — don’t glob. Let each coat cure as the product instructs. Lightly sand the final primer coat with 320 grit if you want extra smoothness.
10) Topcoat — paint or bedliner
- For a painted look: use an automotive topcoat to match the bed color. Spray multiple thin coats rather than one thick one.
- For heavy-duty protection: use roll-on or spray-on bed liner (textured). Follow mixing and application instructions carefully — these create a tough, textured surface that hides imperfections and resists future wear.
11) Clear coat & seam sealing (Optional)
If you used standard paint and want extra protection, add a clear coat. Use seam sealer on joints to prevent water intrusion.
12) Cure & reassemble
Allow coatings to cure fully according to their labels before loading the bed. Reinstall hardware and add a rubber bed mat for extra protection (and to stop small chips from becoming new rust spots).
Fixing Chipped Paint on Your Old Truck Bed Floor
Chipped paint on your truck bed floor may look harmless at first, but it’s really rust’s way of sneaking in through the back door.
Every scratch, nick, or chip exposes bare metal, and once moisture hits it, the clock starts ticking.
The good news? Fixing paint chips is simple, doesn’t take a full weekend, and saves you from expensive repairs down the road.
Here’s a quick step-by-step guide to patch up those chips and keep your truck bed tough, clean, and ready for work.
1) Inspect & clean the area
Vacuum or sweep out dirt, then wash the bed thoroughly with soap and water. Dry completely. Degrease the chipped spots so nothing oily is left behind.
2) Remove loose paint
Use sandpaper or a wire brush to knock off flaking paint around the chip. Don’t just sand the spot — feather the surrounding edges so you don’t end up with a visible ridge.
3) Sand to smooth
Work the chip down to bare metal if needed (start with 80–120 grit), then smooth the edges with 220 grit.
4) Check for rust
- No rust? Skip ahead.
- Light rust? Brush on rust converter, let it cure as directed.
- Deep rust/pits? Consider filler or professional repair.
5) Clean again
Wipe with a tack cloth or lint-free rag plus degreaser. A clean surface is the difference between a lasting fix and a peel-off mess.
6) Prime the bare metal
Spray or brush on a rust-inhibiting primer. Use thin, even coats. Let dry fully (check the can’s dry time). Lightly scuff with 320 grit if needed.
7) Paint or coat
- Color match: Use automotive touch-up paint to blend with the bed color. Multiple light coats work better than one thick one.
- Durability first: If you use a bed-liner product (spray or roll-on), apply it over the primed area for a tougher, textured finish.
8) Let it cure
Give the coating time to harden (a few hours to a few days depending on the product). Don’t toss heavy loads in the bed until it’s fully cured.
How to Prevent Truck Bed Rust (and Keep the Paint from Peeling)
The best way to fight rust is to never let it start. Prevention may not sound exciting, but it’s way easier than grinding, sanding, and repainting later.
Here’s how to keep your truck bed tough, shiny, and rust-free:
1. Keep it clean
Dirt, road salt, and moisture love to hide in the corners of a truck bed. Wash it regularly, especially after winter driving or hauling messy loads. A quick rinse can save you hours of rust repair later.
2. Touch up chips immediately
Every chip in the paint is an open invitation for rust. Keep a small touch-up kit handy and seal chips as soon as you spot them. Think of it as putting a band-aid on a cut before it gets infected.
3. Use a protective coating
Bed liners (spray-on, roll-on, or drop-in mats) do more than make the bed look good—they protect against scratches and peeling. Spray-on or roll-on liners are especially tough because they bond directly to the metal.
4. Dry it out
Standing water is rust’s best friend. Park on a slight incline when possible so water doesn’t pool, and clear leaves or debris that trap moisture.
5. Watch the seams and corners
Rust loves tight spots where water hides. Inspect seams, welds, and corners often. A dab of seam sealer or extra coating here can make a big difference.
6. Wax or seal occasionally
If your truck bed is painted rather than lined, a coat of automotive wax or paint sealant helps paint resist peeling and UV damage.
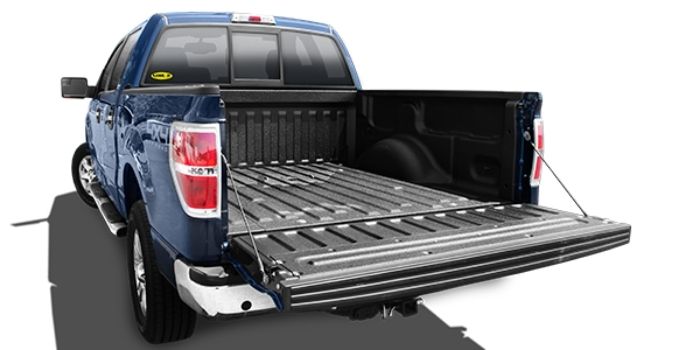
When and How Should You Replace the Old Rusty Bed Floors of Your Truck?
Over time, constant exposure to moisture, dirt, and heavy loads causes the metal floor to weaken.
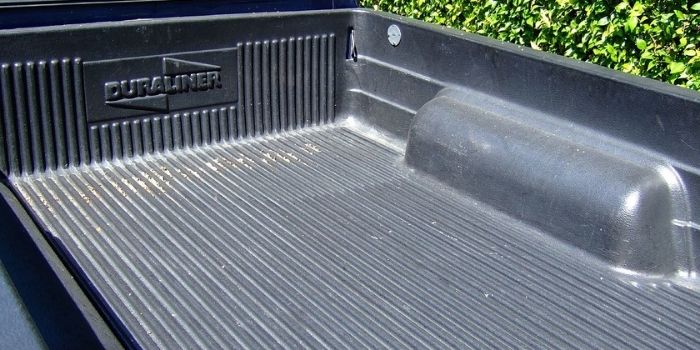
Once rust sets in, it spreads quickly, eating away at the structure and making your truck less safe and less reliable. Instead of letting the damage worsen, replacing the bed floor with something durable like DuraLiner gives your truck a new lease on life while saving you from more expensive repairs later.
The process begins with removing the old, damaged floor. This usually involves removing rusted bolts and nuts that have been holding the panels in place for years. At first glance, this can feel like a frustrating task, but with the right tools and some patience, it’s manageable.
Using penetrating oil and the proper wrenches helps break the rust bond. Sometimes you may need to cut through especially stubborn fasteners, but that’s all part of clearing the way for a strong new base.
Once you’ve managed to loosen corroded bolts and detach the old panels, the real progress begins. Cleaning and prepping the frame underneath is critical before laying down the new bed floor.
This ensures that the new metal has a solid, rust-free surface to sit on, which extends its life and prevents the same problem from reappearing anytime soon.
Installing a fresh truck bed floor not only restores strength but also gives you peace of mind. Whether you use your truck for heavy hauling or just everyday tasks, you’ll appreciate the sturdiness and clean finish.
Plus, if you ever decide to sell, a solid bed floor instantly makes your truck more appealing and valuable. Replacing it is an investment—not just in your truck’s performance, but in the confidence you feel every time you put it to work.
Conclusion
Whether you drive a Ford, GMC, Chevy—or anything in between—your truck bed is bound to take a beating.
Dirt, rust, and chipped paint are part of the deal when you actually use your truck the way it’s meant to be used.
The good news is they don’t have to be permanent scars. With the simple steps we’ve covered, you can tackle rust, fix chips, and stop peeling paint before it gets out of hand.
A little attention now keeps your truck looking sharp, working hard, and lasting longer. So don’t wait for a small spot to turn into a big headache—grab your tools and give your truck bed the care it deserves.